
Slipstream Windows Vista Service Pack 1
By: Arie Slob
 Slipstreaming a Service Pack is the process to integrate the Service Pack into the installation so that with every new installation the Operating System and Service Pack are installed at the same time.
Slipstreaming is usually done on network shares on corporate systems, but it also makes sense for the home or small business user to do.
Microsoft had originally planned to make the system of integrating a service pack into Windows Vista an easy task by supporting integration into offline images, but because Microsoft made some significant changes, this is not supported in SP1. Right now the word is that this should be supported in future service packs.
However, there is a method of repacking the install.wim to make a Vista SP1 integrated media image. The disadvantage of this method is that it requires a complete install of Vista RTM in order to integrate the service pack. For those of you who want to slipstream Vista SP1, this may be the only way to do it as Microsoft does not provide any switches in the SP1 executable to allow for simple integration.
What you need
- A Windows Vista installation DVD
- A copy of the full SP1 update. If your (Vista) language is either English, French, German, Japanese or Spanish, download this file (32-bit) [434 MB] or this file [726 MB] if you have Vista 64-bit. If you are using any other languages, you'll need to download this file (32-bit) [544 MB] instead. The 64-bit version can be downloaded here [873 MB]
- The Windows Automated Installation Kit (WAIK) [992 MB]
You'll have to burn the image you download to a DVD & install WAIK on your primary Vista install. - A registered copy of UltraISO*.
*) I have tried many products, but haven't found any free program that will let you Open/Save the ISO image & replace a file within the image & then let you save it. If you know of any, please let me know and I'll check it out.
Here are the steps required:
- Install Vista RTM to a secondary partition (not the main boot partition). You don't want all the files of the boot partition being part of the final image.
- During the installation, once in the Out of Box Experience (OOBE) after setup starts, press Ctrl+Shift+F3 to enter Audit mode. (OOBE is the part of setup where you are prompted to enter your username, password etc.)
- After this, the system will reboot into Audit mode and a Sysprep window will pop up. Do not close this Sysprep window.
- Run the Vista SP1 installer you downloaded above.
- Optionally, you can run a new tool that comes with SP1 called Vsp1cln.exe to remove older versions of components that have been upgraded to new versions in SP1 to save disk space. To remove these older RTM files, simply run Vsp1cln.exe via the Run command or from a command prompt after installation of SP1 has been completed.
- After the SP1 setup is complete, you'll be back at the main Vista desktop with the Sysprep window open and SP1 installed. From the Sysprep selection window, select OOBE, Generalize, and then select to Shut Down the system.
- Boot the system into a WinPE disk or another OS install, do NOT boot back into the Vista SP1 you just setup, and run the following imagex command (imagex can be found in the Windows Automated Installation Kit (WAIK) you downloaded above:
imagex /compress maximum /flags "Ultimate" /capture d: c:\install.wim "Windows Vista Ultimate"
where d: is the drive Vista SP1 is installed on and c:\install.wim is the location to store the new install.wim. Replace "Ultimate" after the /flags switch with whatever edition of Vista installed (supported flags are HomeBasic, HomePremium, Starter, Ultimate, Enterprise, ServerDatacenter, ServerEnterprise and ServerStandardand) to slipstream SP1. - Once the image has been built, replace the old install.wim in the Vista RTM ISO in \Sources\ with the newly created install.wim using a registered version of UltraISO (Version 8.0 or higher). Here is how:
- Start UltraISO, and select your DVD drive with your Vista DVD loaded under UltraISO's local header. Next select Tools > Make CD/DVD Image (Figure).
- UltraISO will capture & save your DVD image under \Users\{user ID}\Documents\My ISO Files\LRMCFRE_EN_DVD.iso (LRMCFRE_EN_DVD is the volume label of my Vista DVD, your label might be different). Don't change any of the default settings. When UltraISO has saved the image, it will ask you if you want to open it, select yes.
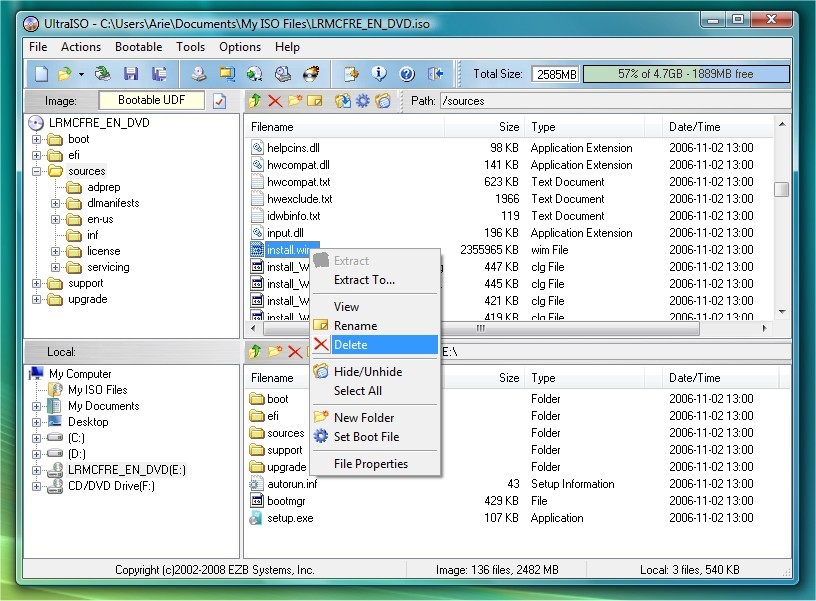
- From the opened image, select the /sources folder and browse for the install.wim file. Right-click this file and select delete (Figure).
- Next copy the new install.wim you created in step 7 above into the /sources folder. You do this by selecting the hard disk location where you saved the install.wim you created in step 7 above from under the Local: header in UltraISO, then select and drag & drop install.wim to the /sources folder (Figure).
- From UltraISO's menu select File >: Save
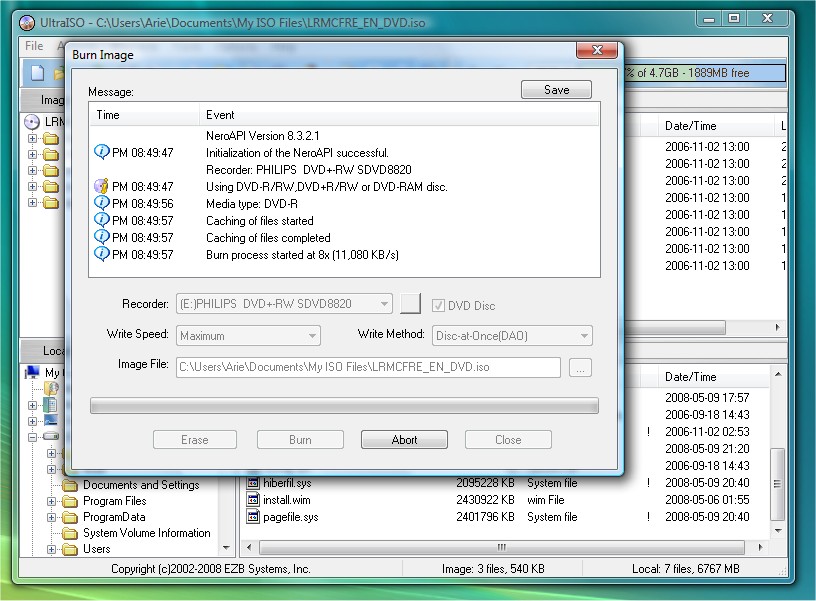
- Once the ISO has been saved, make sure that the install.wim file from the /sources folder is the updated install.wim (look at the date). Now put a blank (writable) DVD in your DVD writer and select Tools > Burn CD/DVD Image (Figure).
- When ready, you'll have your Vista install DVD with SP1 included.
Note that the process above is to slipstream SP1 into a single edition of Vista. To integrate SP1 into all the editions of Vista, repeat steps above for each edition and use the imagex /append function to build an install.wim that contains all the editions of Vista, and then replace the original install.wim with install.wim with all editions or editions required in the RTM ISO image.
Give your comments on this article.
Recent Forum Discussions
windows automatic updates forced (5)
Windows ME and Explorer.exe always causing er.. (0)
Looking for a TV tuner card and a video captu.. (0)
Windows 7 notifies that installed copy is not.. (2)
IE 10 Opening in Full Page (4)
MS Office 2010 Set up for exams (3)
E-mail Mail Merge with Windows 7 & Office.. (3)
Code 19 Error Toshiba Optical Drive (2)
USB Memory Stick vs USB Flash Ext HDD (2)
New Windows 7 install - Fan keeps spinning (4)
Why does Firefox sometimes hang when closing? (8)
blue screen help (5)
[Mediocre wireless reception with new Dell xp.. (5)
Strongvault (6)
Do You Like the Windows 8 UI Design? (38)
How to get a copy of sent mail from MS outloo.. (4)
Deleting a page from Facebook (7)